Introduction
The Symfony Security documentation page provides detailed information about all of the topics below. This page will be a guide featuring the specific needs of our CIS-294 Software Engineering projects. Please note that this information was updated in Winter 2026 and corresponds to the Symfony 8.0 release. These notes will cover creating a user entity, adding a user via phpMyAdmin, and getting started with available authentication options.
I recommend that a couple of people from your team work together to complete these steps. Sitting down by yourself to work through these instructions is confusing at best, but when two or three people look at it together, it's easier to figure things out because each person spots different things. Also, CIS-294 is a group project, so pair programming and the occasional hackathon are a really good way to go.
Install the Security Bundle
The security bundle is already installed for your project! You can skip this step.
Before You Begin
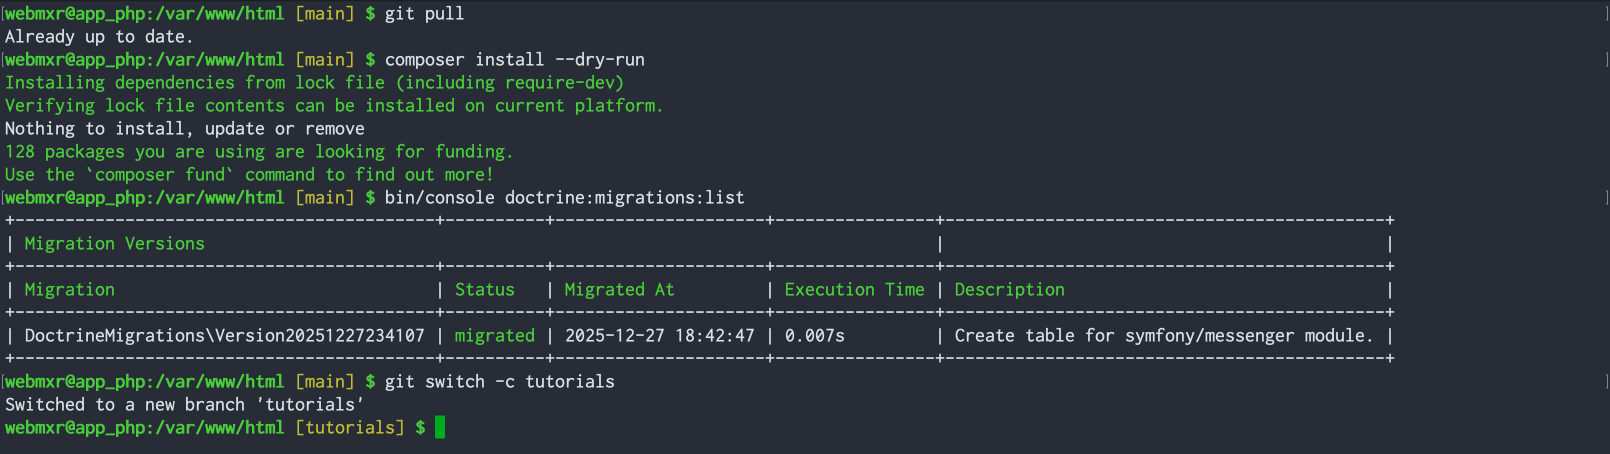
This tutorial will add a new Symfony entity and modify your database structure. Before beginning, make sure you have pulled and installed the latest changes from GitLab for your project, verified your database schema is up-to-date, and created a new branch for your issue.
Reminder: Whenever using Symfony's bin/console commands, prompts in yellow indicate default responses. You can press the enter/return key to accept the default values.
Naming Conventions
Please be sure to follow Symfony coding standards when naming classes and properties.
- Class names should only be in UpperCamelCase.
- Property and method names should only be in lowerCamelCase.
- Entity names should be singular. An entity describes a
Useror anOrder, not collections of users and orders. - Files MUST use only
<?phpopen tags. Do not close PHP tags at the end of files, it only slows down the parser.
Create a User Entity
Run the make:user console command to create a user entity.
Project requirements for CIS-294 include using username as the unique "display" name for user entities. You can create user entities before your data dictionary is complete then add additional properties later. The image below shows the minimum requirements for creating a User entity type.
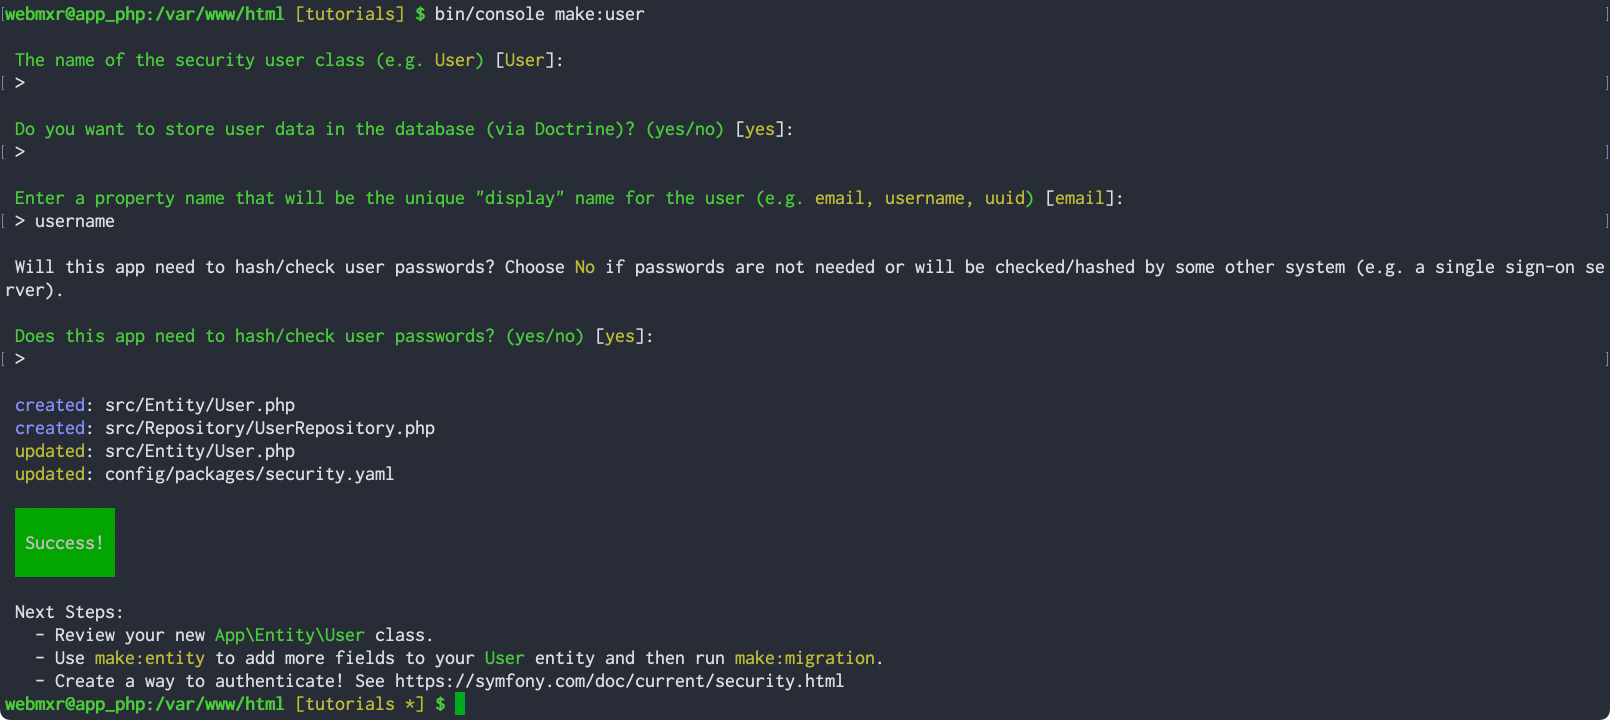
Note that the response displays changes made, which can also be viewed with git status.
If you want to add more properties now, run bin/console make:entity User.
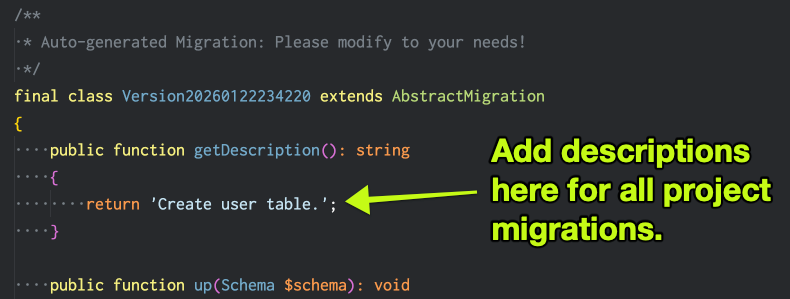
The next step is to make and run the migration to add the user table to the database. Don't forget this step! Use bin/console make:migration to generate the migration.

Edit the new migration in VS Code to add a description. This will be helpful when viewing the migrations list in the console.
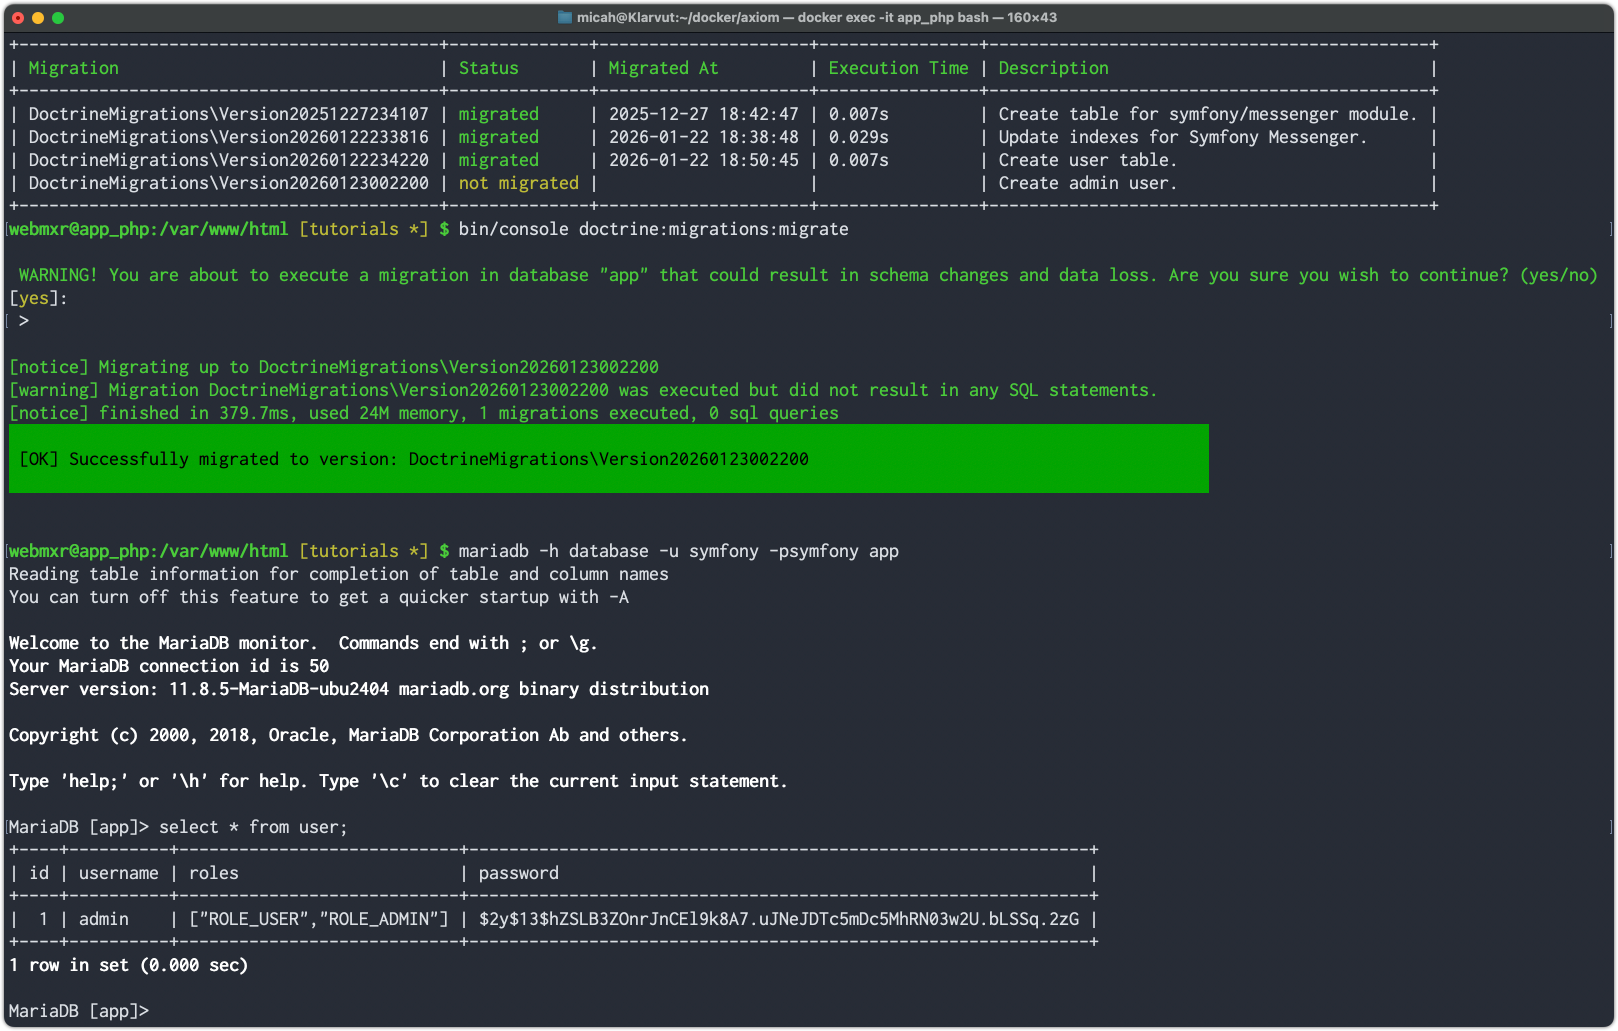
Now check and run the migration with bin/console doctrine:migrations:list and bin/console doctrine:migrations:migrate in the console.
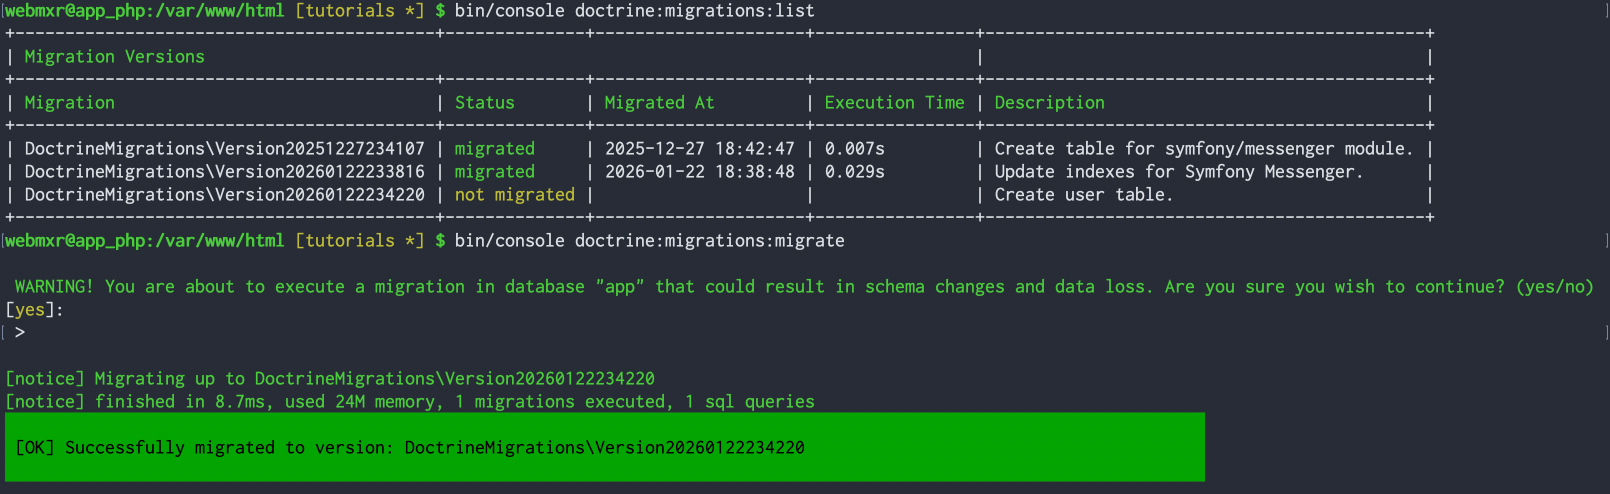
Check your database with phpMyAdmin. If everything looks good, use git add and git commit to add and commit your changes.
Create the admin user
Now we have a user table in the database, but we don't have a good way to create an admin user! The Symfony documentation has some information about hashing passwords manually to create a user, but it would be preferable to have this account generated automatically when installing a new site. We can do this with a custom database migration.
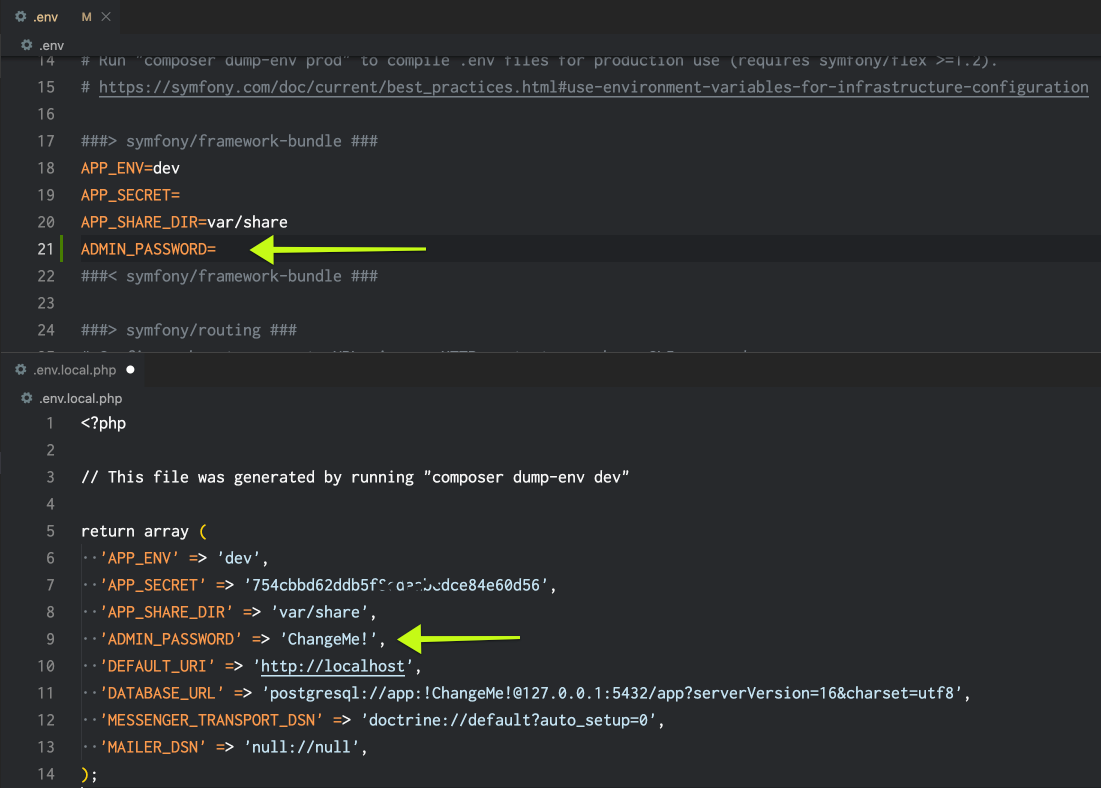
Begin by setting up a default admin password for your application. Add an ADMIN_PASSWORD setting to the application's .env file and the custom .env.local.php file you created when setting up your environment. These can be throwaway passwords that can be changed later. (If you don't have a .env.local.php file, run composer dump-env dev to create one.)
Create a custom migration by hand. Note that the filename and class name of the migration added above includes the date and time when the migration was created. Using the current time (in GMT) or simply increment the time of the previous migration, create a file in your project's migrations directory with the new name. Copy and paste the previous migration and update the class name to match. Next, change the description and remove all the code inside the up() and down() methods.
Example: The name used in the screenshot above is Version20260122234220 and my new copy is Version20260123002200.
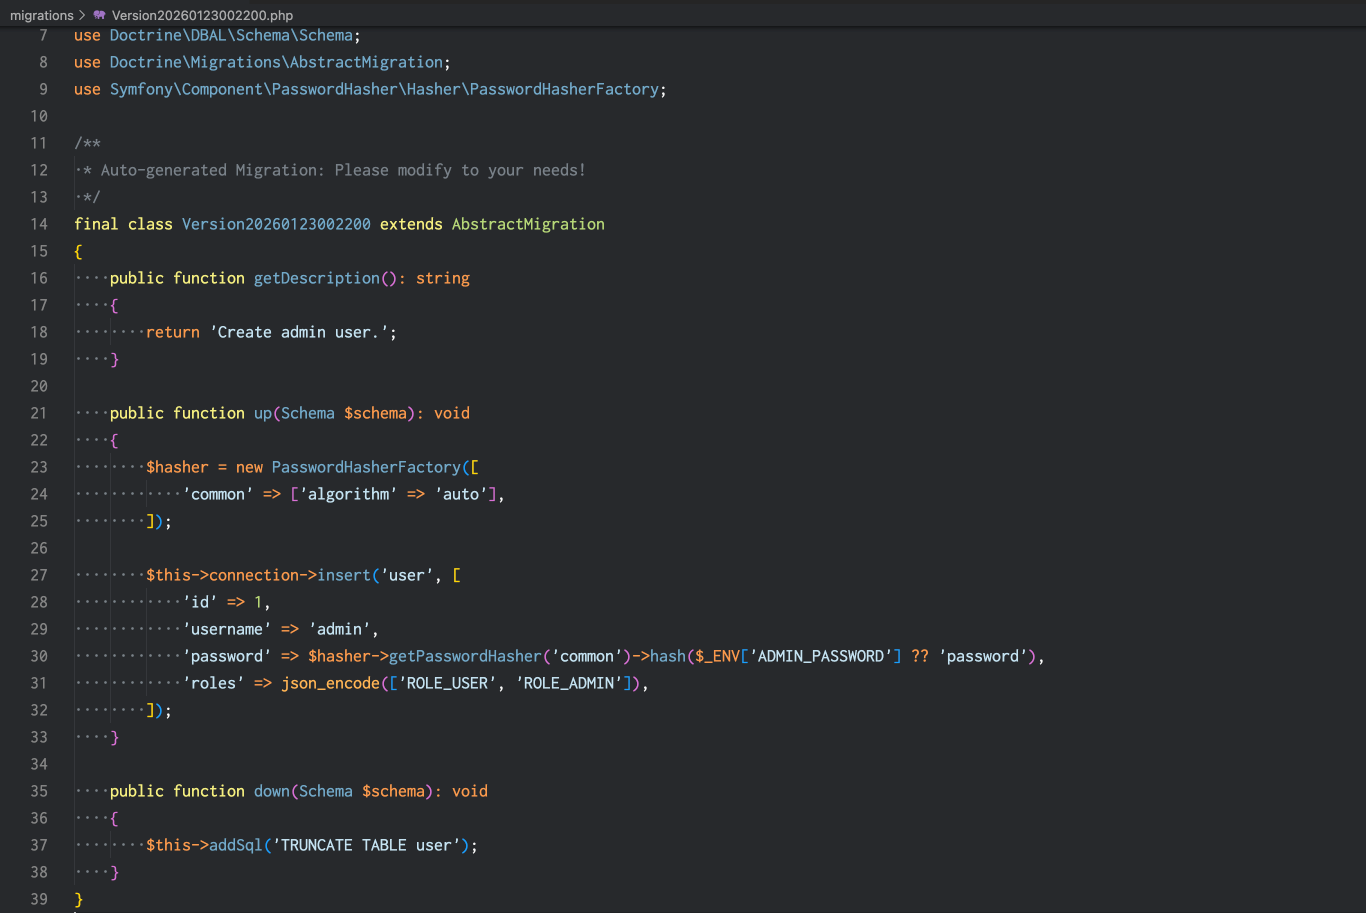
We now need to generate a hashed password from the values stored in our environment files. Import Symfony's password hasher factory at the top of the new migration file.
use Symfony\Component\PasswordHasher\Hasher\PasswordHasherFactory;
In the up() method of the new migration, add code to create a hasher service and insert data into the user table. This code will use the ADMIN_PASSWORD value stored in configuration, but falls back to password if the variable is not set. This should avoid crashing due to misconfiguration, although it doesn't follow best security practices.
        $hasher = new PasswordHasherFactory([
            'common' => ['algorithm' => 'auto'],
        ]);

        $this->connection->insert('user', [
            'id' => 1,
            'username' => 'admin',
            'password' => $hasher->getPasswordHasher('common')->hash($_ENV['ADMIN_PASSWORD'] ?? 'password'),
            'roles' => json_encode(['ROLE_USER', 'ROLE_ADMIN']),
        ]);
Note: if you used make:entity to add additional required properties above, add those values to the example.
You may have noticed Doctrine migrations have up() and down() methods. Doctrine migrations are reversible, allowing changes to be reversible. It seems reasonable that this migration should empty the user table in reverse, rather than simply removing a single user.
Add the following to the down() method:
$this->addSql('TRUNCATE TABLE user');
Run the migration and verify the user was created in the database.
Once again, be sure to git add and git commit your changes. Unless you want to continue with additional tasks below, push your changes to the GitLab server and mark the merge request ready for review.
Create an API login endpoint
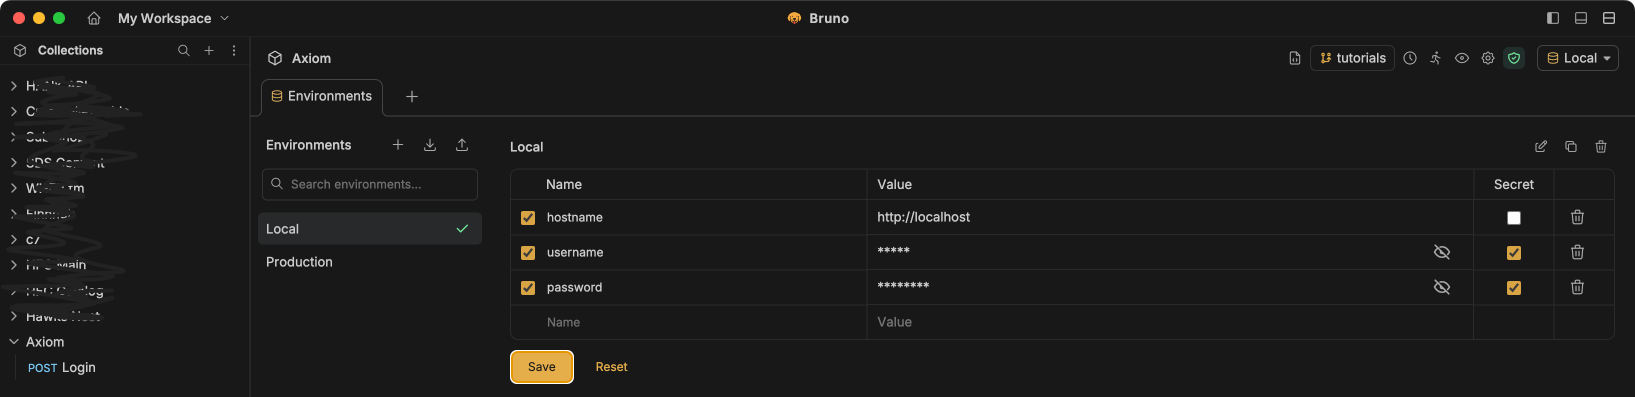
In this class we will use Bruno as a client to test our API endpoints. You can think of Bruno as a browser for API connections. To get started, download the client and open a collection. The collection will be in the bruno folder where your project is installed locally. Select the Local environment at the top right, then open configure. Set the username admin and the password you used above and save your settings.
Open the login request and click the send button on the far right side of the screen. The response should include a 404 error, because the /api/login endpoint does not exist. As long as this is the only error you see, everything should be ready for testing.
The next steps follow the documentation for JSON Login on the Symfony security page.
Add json_login under security / firewalls / main as shown in the documentation.
            json_login:
                check_path: api_login
Generate a new controller in your application using the bin/console make:controller --no-template ApiLogin command.
Test the new controller in Bruno. You should see a response, but we haven't verified the login actually worked.
The documentation shows modifications that need to be made to the file, but they're not easy to copy and paste.
Add the following imports to the top of the file:
use App\Entity\User;
use Symfony\Component\Security\Http\Attribute\CurrentUser;
use Symfony\Component\HttpFoundation\Response;
Update the #Route to make sure it uses the correct route name and requires POST requests. (I've wasted far too much time troubleshooting incorrect route names!)
#[Route('/api/login', name: 'api_login', methods: ['POST'])]
Add #[CurrentUser] ?User $user as an argument to the index() method.
Add code to validate the user information inside the method, above the return:
        if (null === $user) {
            return $this->json([
                'error' => 'missing credentials',
            ], Response::HTTP_UNAUTHORIZED);
        }
Update the response to include a 'data' value with properties of user and token.
        return $this->json([
            'data' => [
                'user' => $user,
                'token' => 'placeholder',
            ],
        ]);
Now when testing, you should see all the data from the current user. To verify it's working, go back to the Bruno environment settings and try an incorrect password.
Filtering data with the Symfony serializer
You might be noticing the returned data includes the hashed password and Bruno is showing a failed test that password should be unset. We can use the Symfony serializer to determine what properties are returned from our API endpoints.
You'll notice our code uses $this->json() to return data, but we haven't defined the json() method in our code. Our controller extends Symfony's AbstractController, which provides [AbstractController::json()](https://github.com/symfony/symfony/blob/8.0/src/Symfony/Bundle/FrameworkBundle/Controller/AbstractController.php#L150), which accepts five arguments. The first argument is$data, and the rest are optional. The$context` argument allows us to tell the serializer the "context" of our response.
All of Symfony's data tables are linked to each other when referencing objects. This can be a problem for the serializer, because if we view a User, we can see each SalesOrder placed by that user. However, each SalesOrder references a User, setting up an infinite loop. This is handled pretty seamlessly inside our website application, but we for API responses, we need to be very specific about the data we want. Rather than writing lots of code to fix this problem, we can simply define the context of each request.
Let's consider those two entity types: User, and SalesOrder. When we want information about a user, our context is get_user. When we want information about an Order, our context is get_order. You can name contexts whatever you want, but please follow the naming convention shown here.
For the API, we need to set context on individual properties in the entity. (We can also cautiously add context to methods that return data in an entity object.) When our context is get_user, we might want some information from orders, like order ids and dates. When our context is get_order, we might want the username and email address. Including these properties allows us to retrieve selected data from multiple tables in a single query, without writing any JOIN queries.
We also have certain properties we never want to include in API responses, such as the user's hashed password. That's why we need to talk about context now, even when we've only defined one table!
Context is defined by adding PHP attributes to properties. Open up src/Entity/User.php in your editor to see the attributes already defined to tell Doctrine about properties that relate to database fields. (The ORM attributes provide definitions for Doctrine's Object-Relational Model.)
Start by adding use Symfony\Component\Serializer\Attribute\Groups; to the import section at the top of the User entity.
Unless you added more, our User currently has four properties: $id, $username, $password, and $roles.
Using the #[Groups] attribute, add the get_user and get_order context to $id and $username, but only add get_user to $roles.
    #[ORM\Id]
    #[ORM\GeneratedValue]
    #[ORM\Column]
    #[Groups(['get_user', 'get_order'])]
    private ?int $id = null;

    #[ORM\Column(length: 180)]
    #[Groups(['get_user', 'get_order'])]
    private ?string $username = null;

    #[ORM\Column]
    #[Groups(['get_user'])]
    private array $roles = [];
This should be a good starting point. Your team will define additional properties and contexts while designing the database.
Going back to the login controller, we need to pass the $data and $context parameters to the json() method. We can use PHP named parameters, introduced in PHP 8.0, so we do not have to pass all the optional parameters supported by this method.
Change the output defined above to specify the desired data and context.
        return $this->json(
            data: [
                'data' => [
                    'user' => $user,
                    'token' => 'placeholder',
                ],
            ],
            context: [
                'groups' => 'get_user',
            ],
        );
The output in Bruno should now show all properties for the user except the hashed password.
-- END OF EDITS 01/22/26 --
Generating JWT Tokens
We will use JSON Web Tokens (JWT) to secure communications with the API. Tokens are created and validating using firebase/php-jwt, which is already installed in the starter project.
Tokens are encrypted and verified with a stored secret. Add a JWT_SECRET setting to the application's .env file and the custom .env.local.php file you created when setting up your environment. This can be a randomly-generated string of characters.
Import the JWT namespace at the top of your controller.
use Firebase\JWT\JWT;
Add this code to your controller after user validation and before the return:
        $key = $_ENV['JWT_SECRET'];
        $payload = [
            'sub' => $user->getId(),
            'name' => $user->getUserIdentifier(),
            'iat' => time(),
            'exp' => time() + 28800,
        ];
This code reads the key value from settings and constructs the token payload, using the following registered claim names:
- sub - the Subject claim. In our case, the User ID value.
- name - the username.
- iat - the issued at timetamp.
- exp - the expiration timestamp, set to 8 hours after the issued time.
This payload will be included in the token and read (after signature verification) to identify the user in future requests.
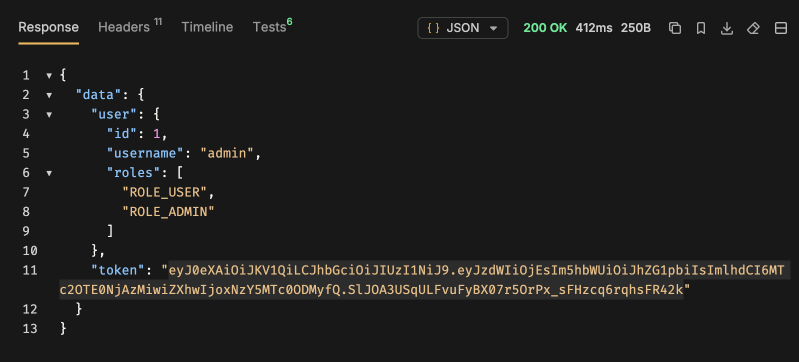
In the output data, change the token placeholder to JWT::encode($payload, $key, 'HS256').
When making a login request with Bruno, you should now see the token in the response. The token value should change slightly on every reload because it contains the current timestamp. You can copy the token from Bruno and paste it into the debugger at https://www.jwt.io/ to inspect the payload. The signature will not validate unless you paste your JWT secret into the verification box on the page. (It is safe to do this as long as you change the secret again after testing.
Once security is configured and logins are working, be sure to add, commit, and push your changes to GitLab.
Reading and verifying tokens will be covered in a separate tutorial.