All students working on the Symfony website should use Docker Desktop as their development environment. By using Docker, we can simplify project installation and ensure that all developers are working in the same environment as our production server. If your Windows PC or laptop cannot run Docker, please contact Mr. James to make alternate arrangements.
If you message me for help with these steps, please specify which operating system and step you need help with.
Quick Summary
To set up the application, you do not need to install PHP, Composer, or Symfony. These steps will help you complete the following tasks:
- Verify correct settings for git and set up some specific configuration for our project.
- Use git to clone the project to your local computer.
- Start Docker and perform some steps so we can open a bash shell inside the running docker container.
- Run a few commands from the shell prompt in the container to create your own config file and build the database.
- Test your site and phpMyAdmin to make sure everything is working.
That's it! Once you've followed these steps, you're ready to work!
These tutorials assume that you already have ssh keys created and working.
Begin by installing Docker Desktop using the link above. Windows installations may require additional installations from Microsoft and multiple reboots. The steps to set up the project in MacOS and Windows (using git bash) are very similar.
You do not need to create a Docker login account. For this project, you can select "skip login" whenever prompted by Docker.
Site Installation with Docker on MacOS
Step 1 (MacOS / Docker)
Before you start, please make sure you've made the following settings on your computer:
git config --global core.autocrlf false
git config --global core.safecrlf false
git config --global core.ignorecase false
git config --global core.whitespace "fix,blank-at-eol,-blank-at-eof,-space-before-tab,tab-in-indent,tabwidth=2"
(See Recommended Editor and Git settings for more details.)
Once these steps have been verified, perform the following using MacOS terminal in your home directory:
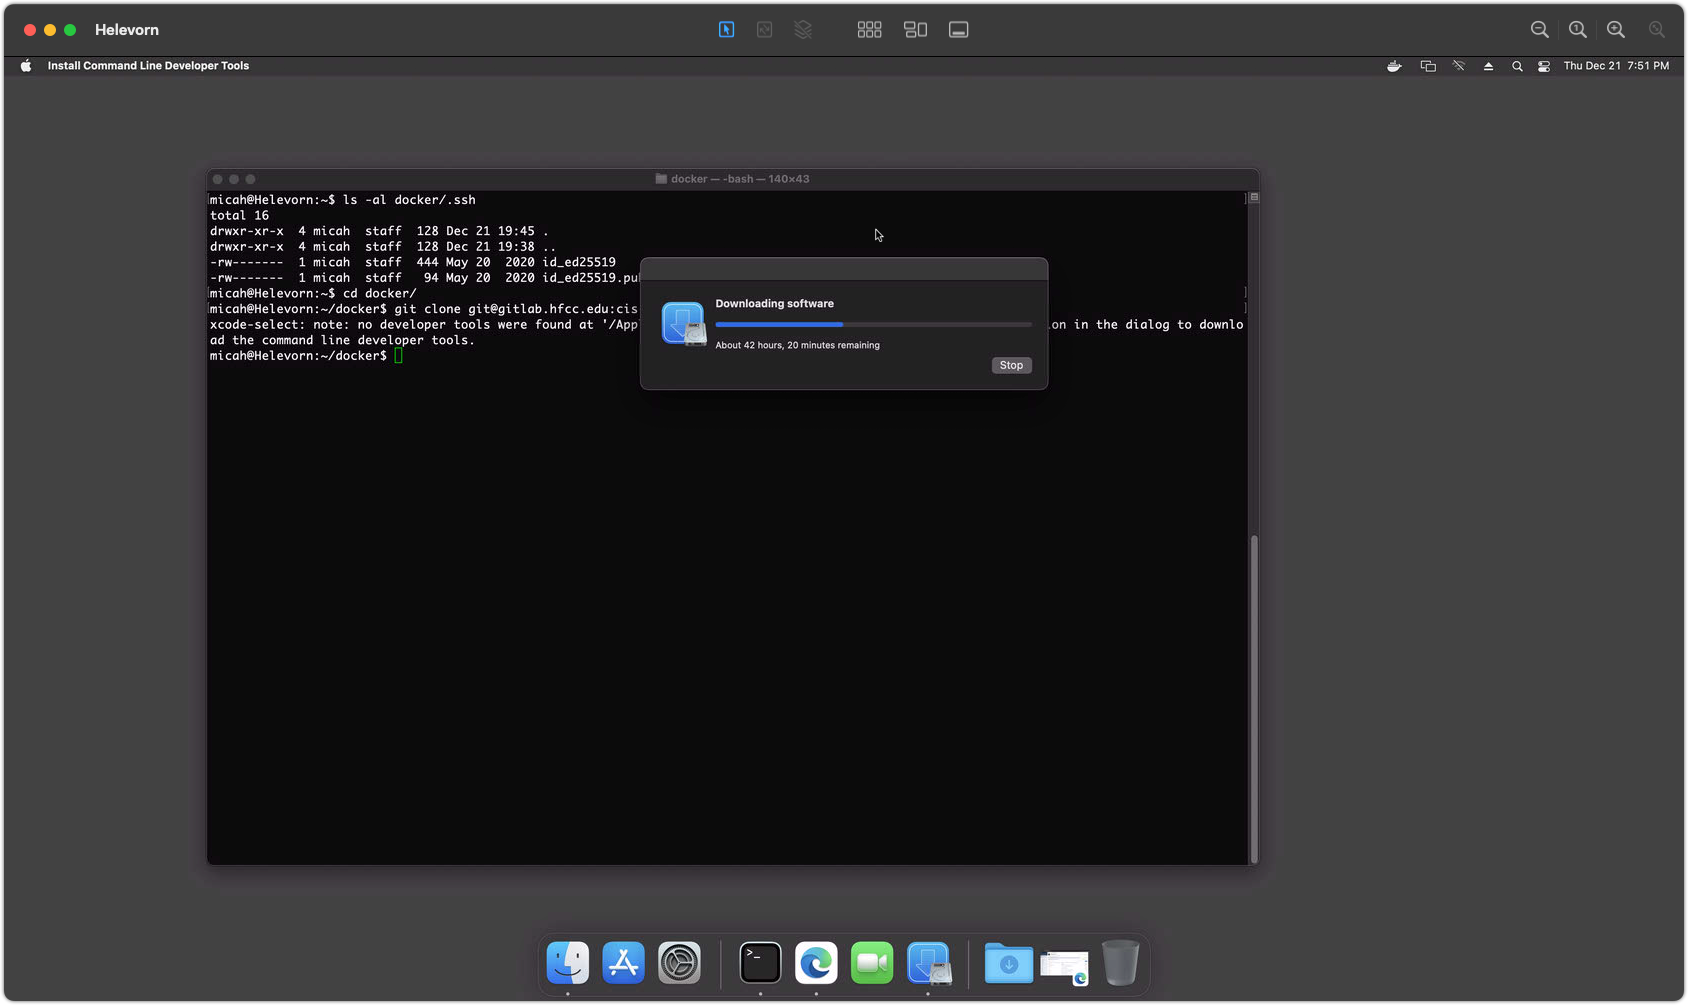
mkdir ~/dockerto create a place for Docker projects.mkdir ~/docker/.sshto store a copy of your ssh keys that can be accessed by the Docker container.cp ~/.ssh/id_ed25519* ~/docker/.sshto copy your keys into the new directory.- Clone the project into the target directory. If git is not installed, follow the prompts to install xcode developer tools.
For Winter 2026: git clone git@gitlab.hfcc.edu:cis-294-26fa/website.git ~/docker/axiom
Screenshot 1 - Git Installation
Step 2 (MacOS / Docker)
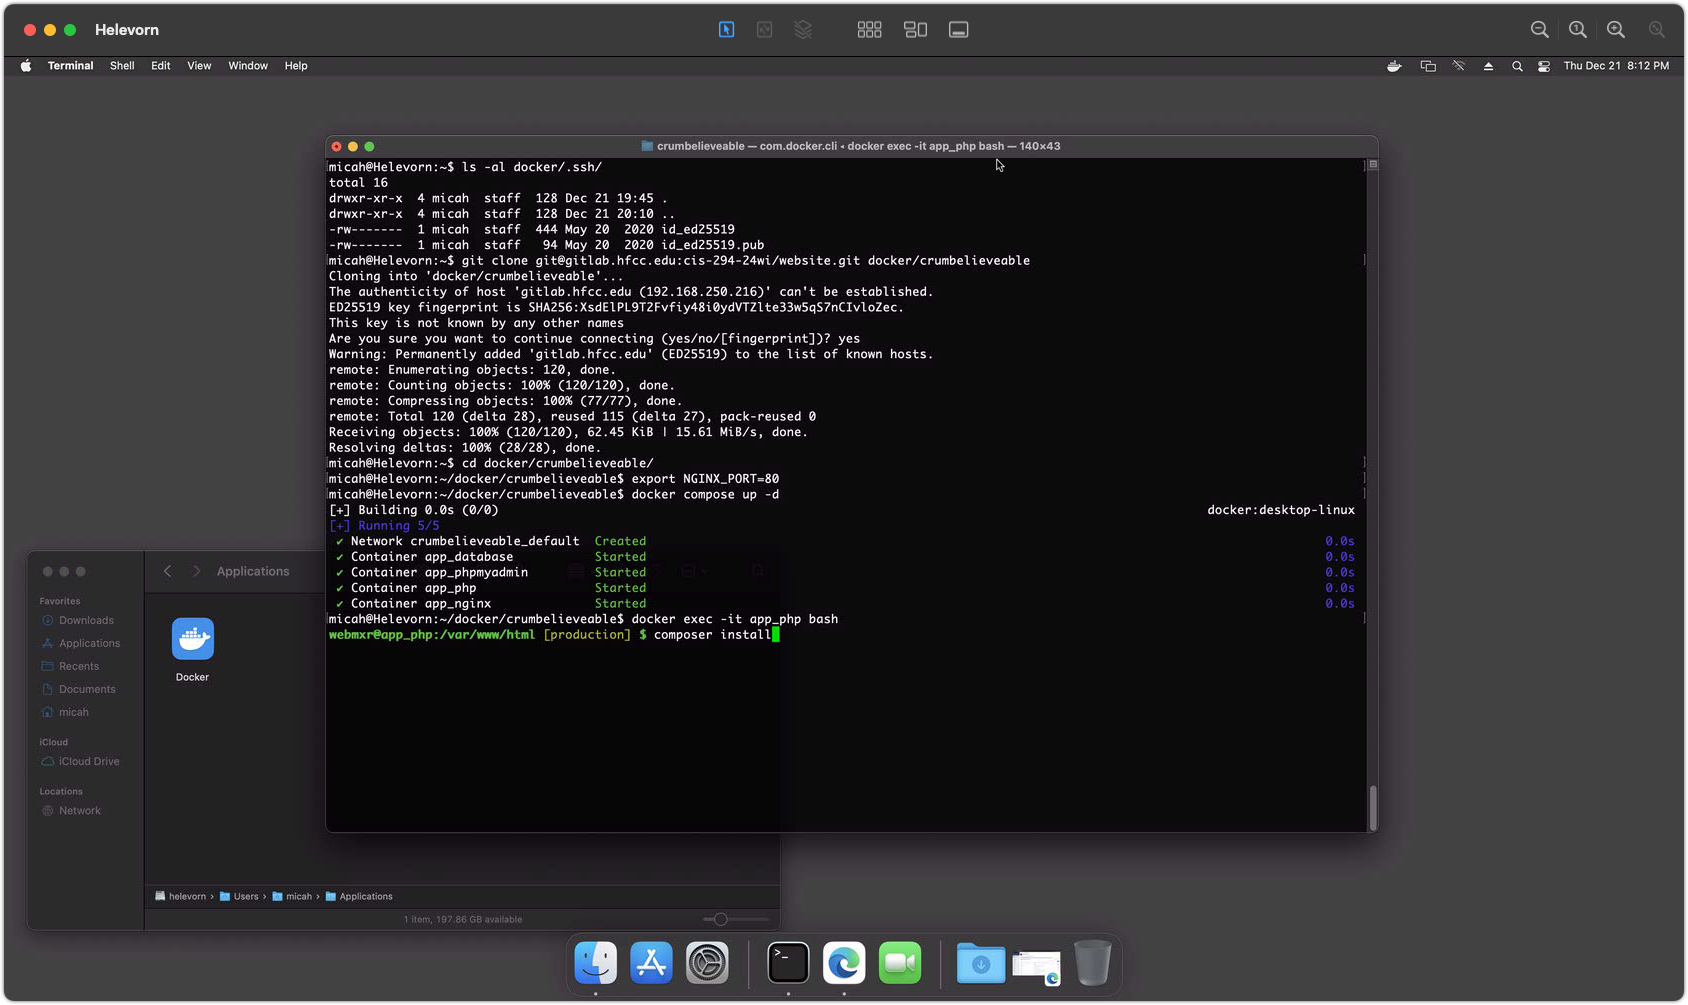
cd ~/docker/axiomto get into the project directory.export NGINX_PORT=80to set the web server to port 80. (See notes below.)docker compose up -dto start the project running in Docker../fixperms.shdocker exec -it app_php bashto open a shell inside the Docker container.composer installinside the container to install Symfony components and dependencies.
Note: You should only need to run ./fixperms.sh the first time, not on every startup.
Setting NGINX_PORT
The NGINX_PORT environment variable sets the port for the Nginx web server in your project. If this is not set, the project will default to port 8080, which you'll need to use in your browser. If port 80 is not available, you'll need to use the default or another port.
(In my Windows screenshots below, port 80 did not work, so you'll see 8080 in my browser's address bar there.)
If port 80 works for your initial test, add the line export NGINX_PORT=80 to your ~/.bashrc file so it will be set automatically every time.
Screenshot 2 - Docker Compose Startup
Step 3 (MacOS / Docker)
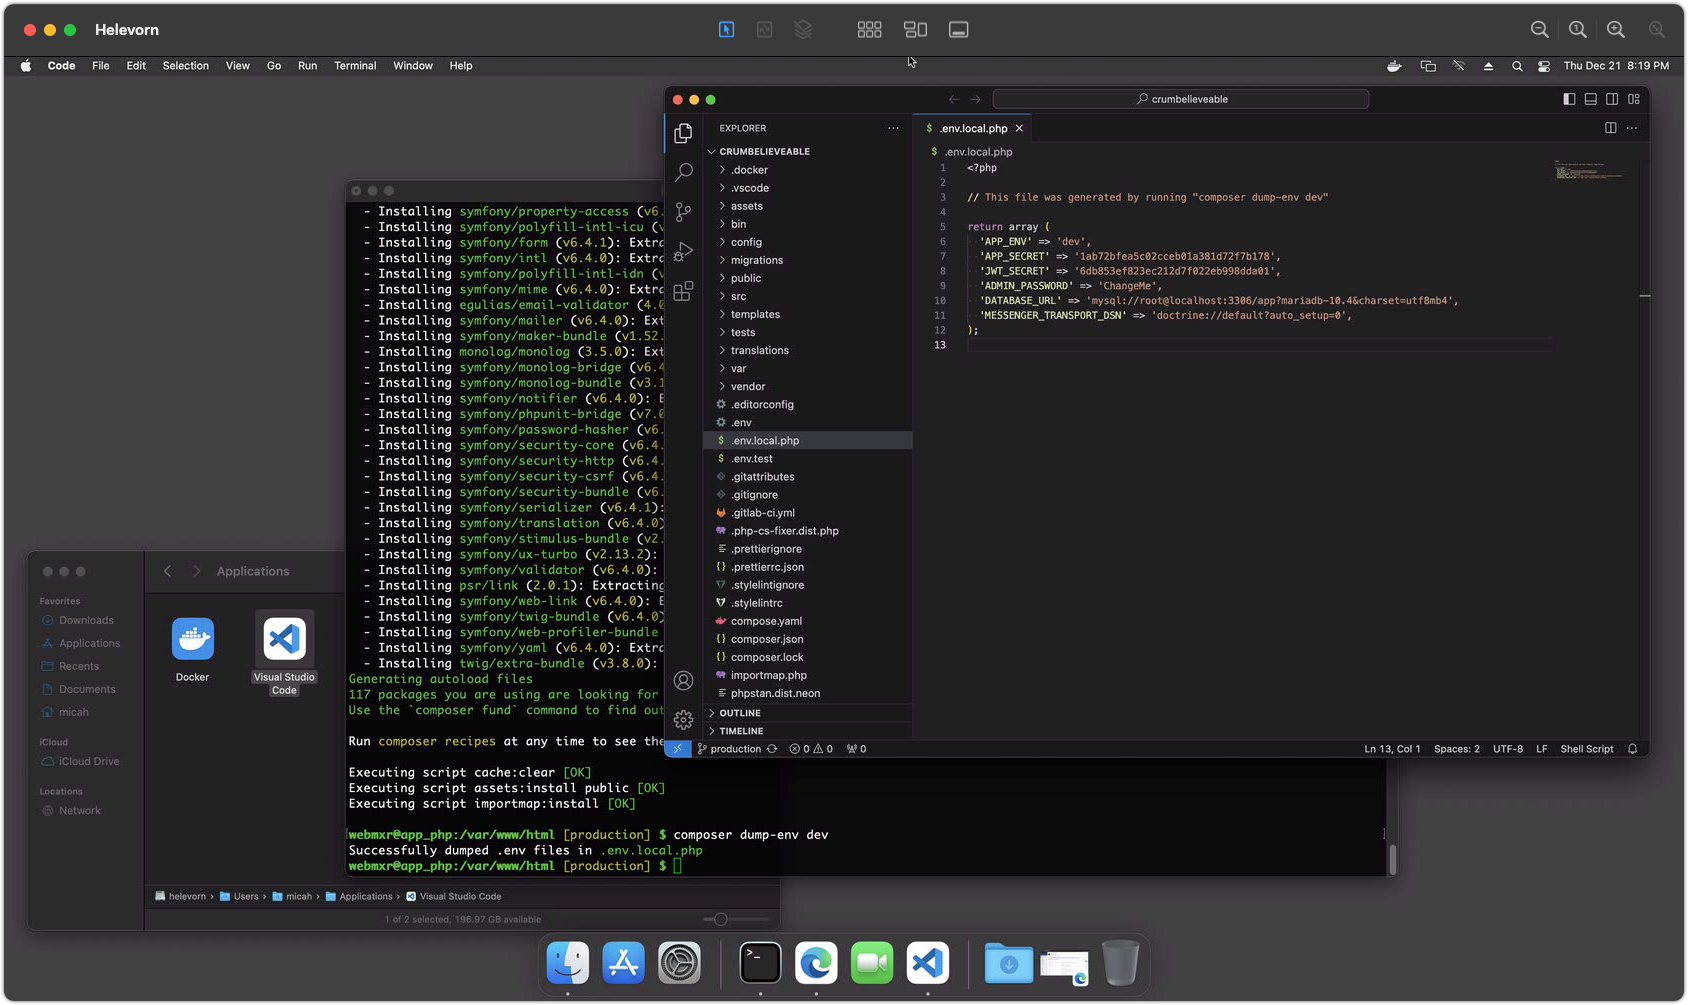
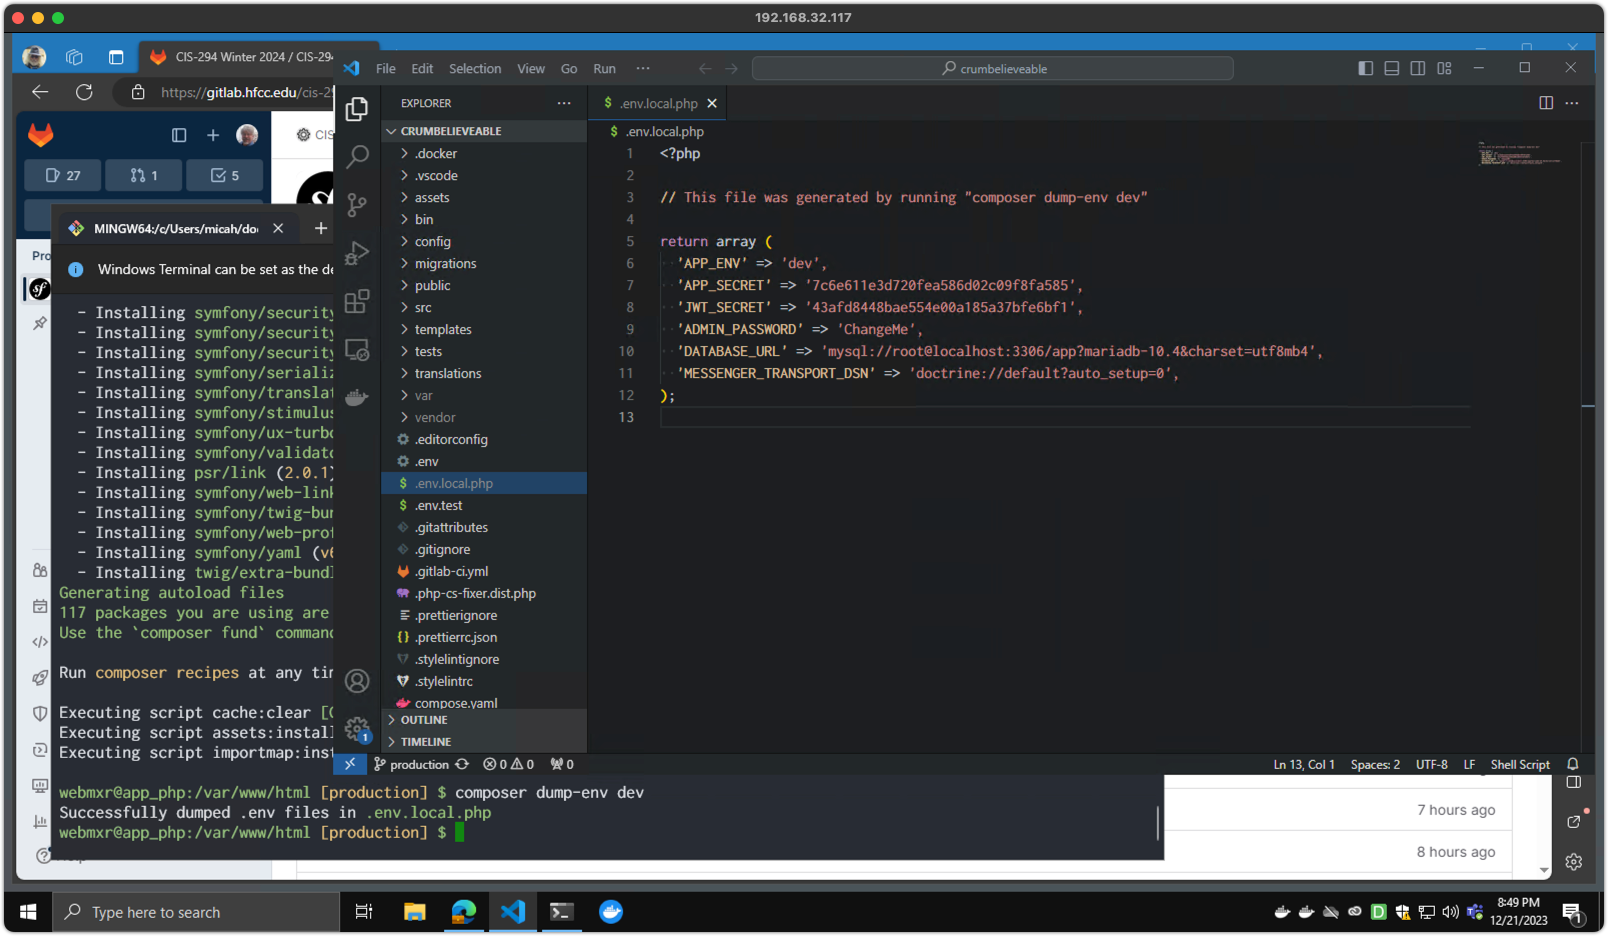
composer dump-env devinside the container to create your own local configuration file.- Open your project folder in Visual Studio Code (or the editor of your choice.)
- Edit the
.env.local.phpto adjust your settings. The defaults should mostly be fine. - Add settings for
ADMIN_PASSWORDandJWT_SECRETif they don't exist. You will need these later to provide an initial password for the admin user and for REST API security.
Screenshot 3 - Setting Environment Variables
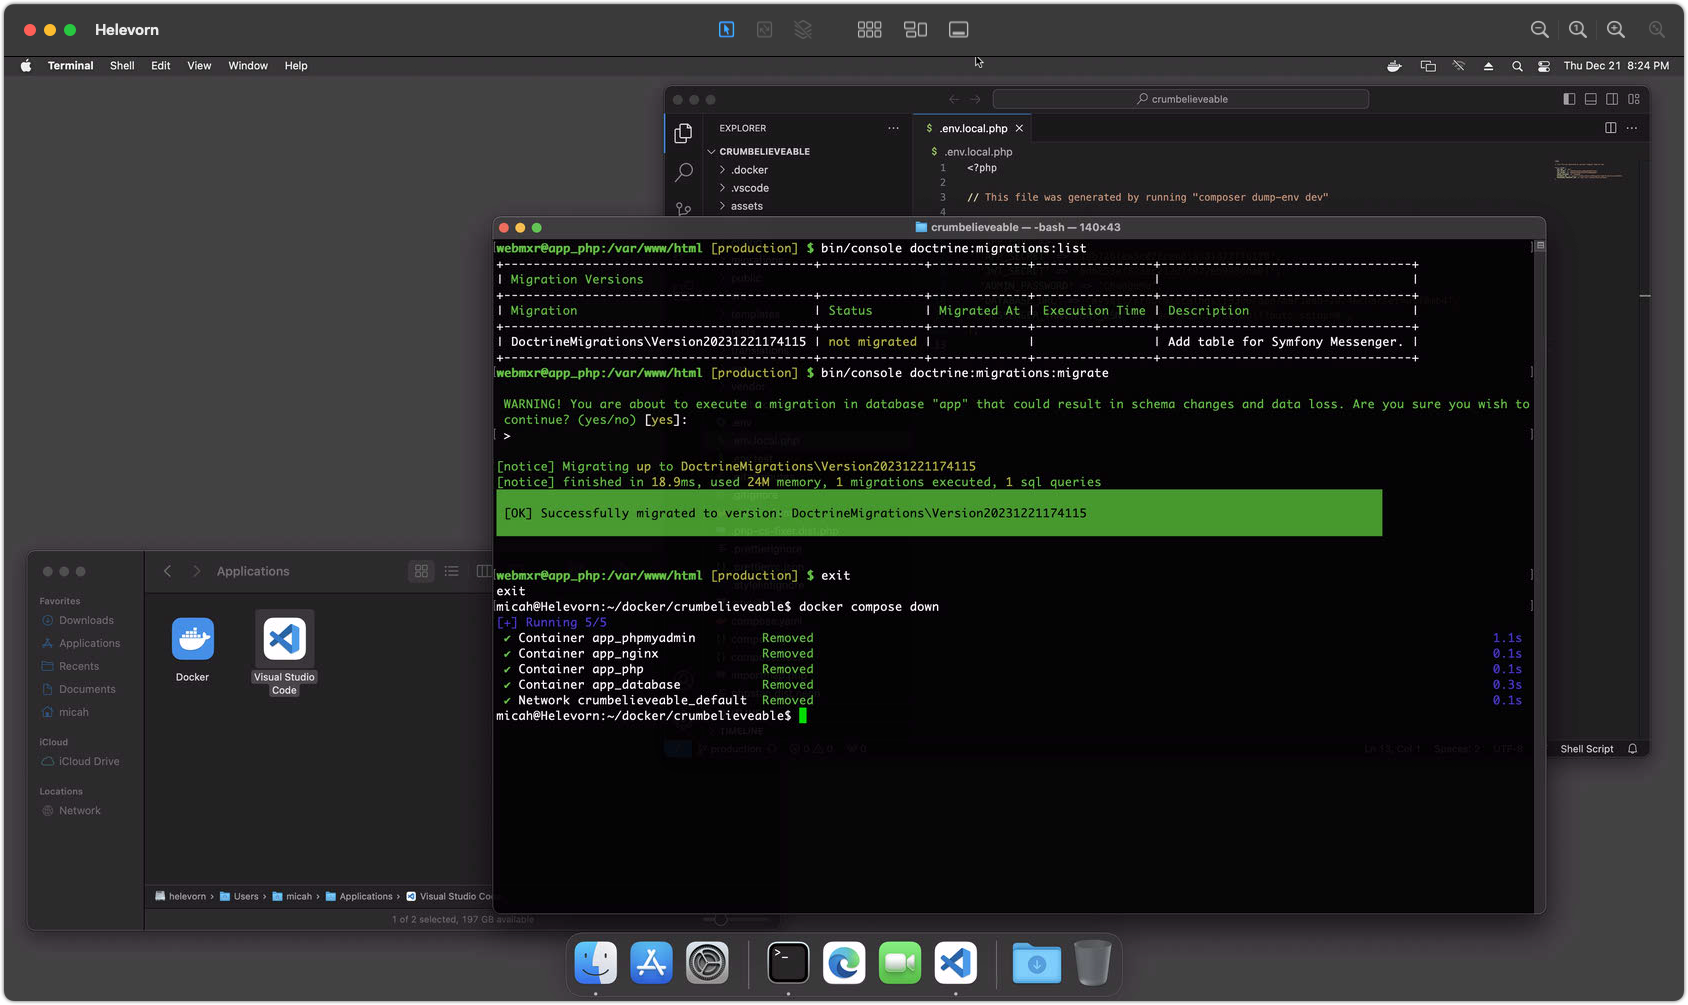
Step 4 (MacOS / Docker)
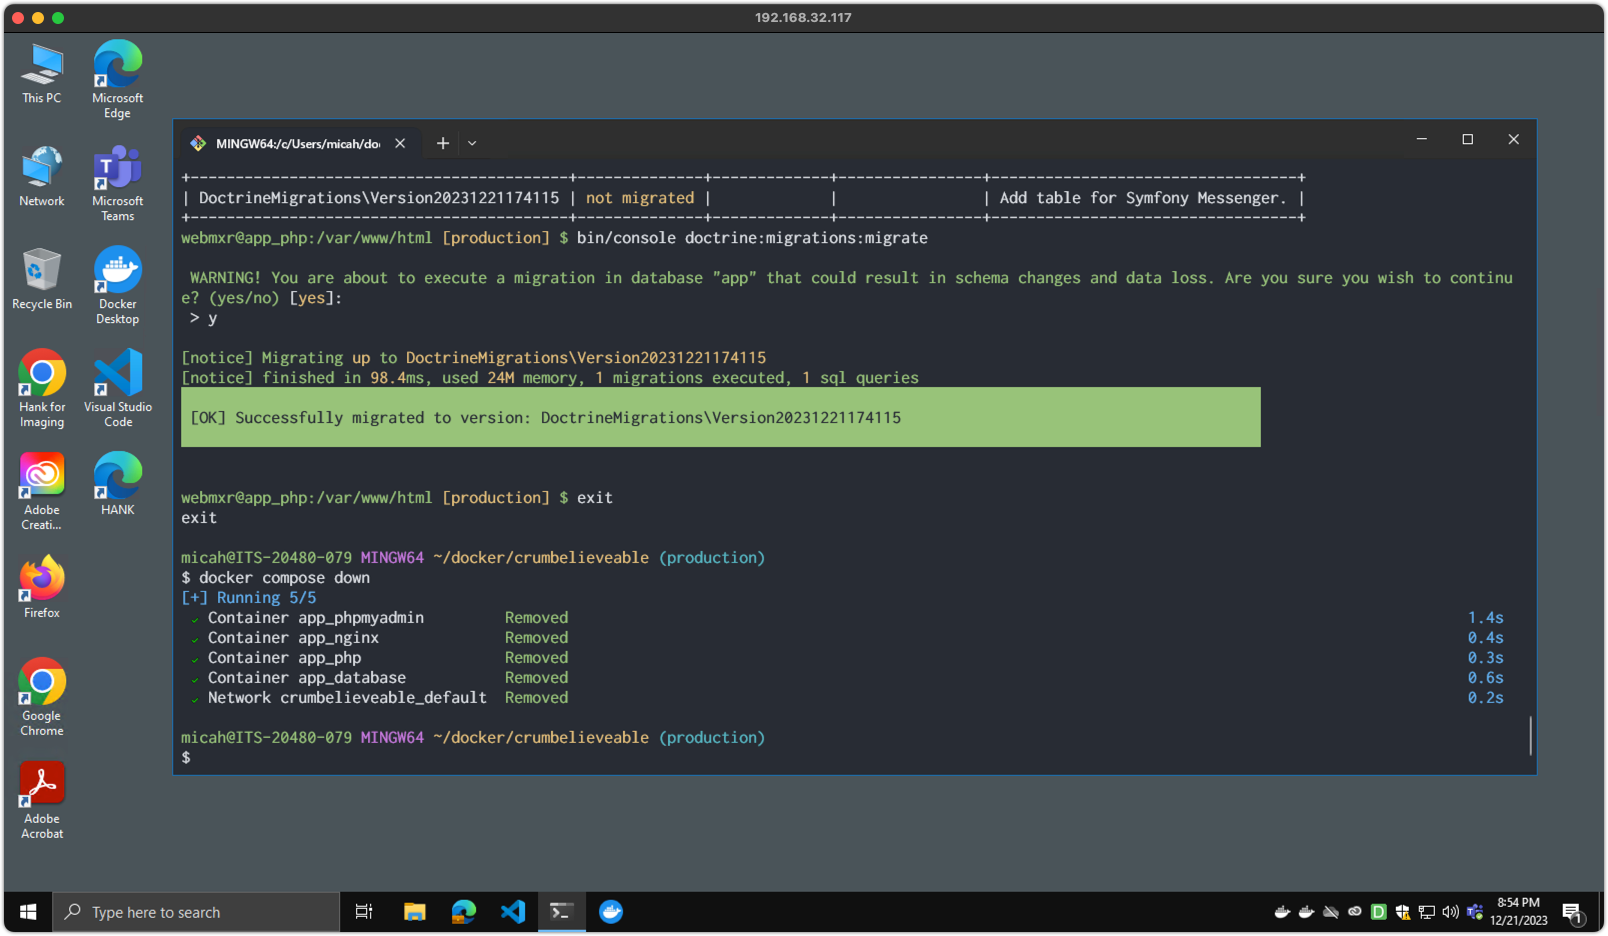
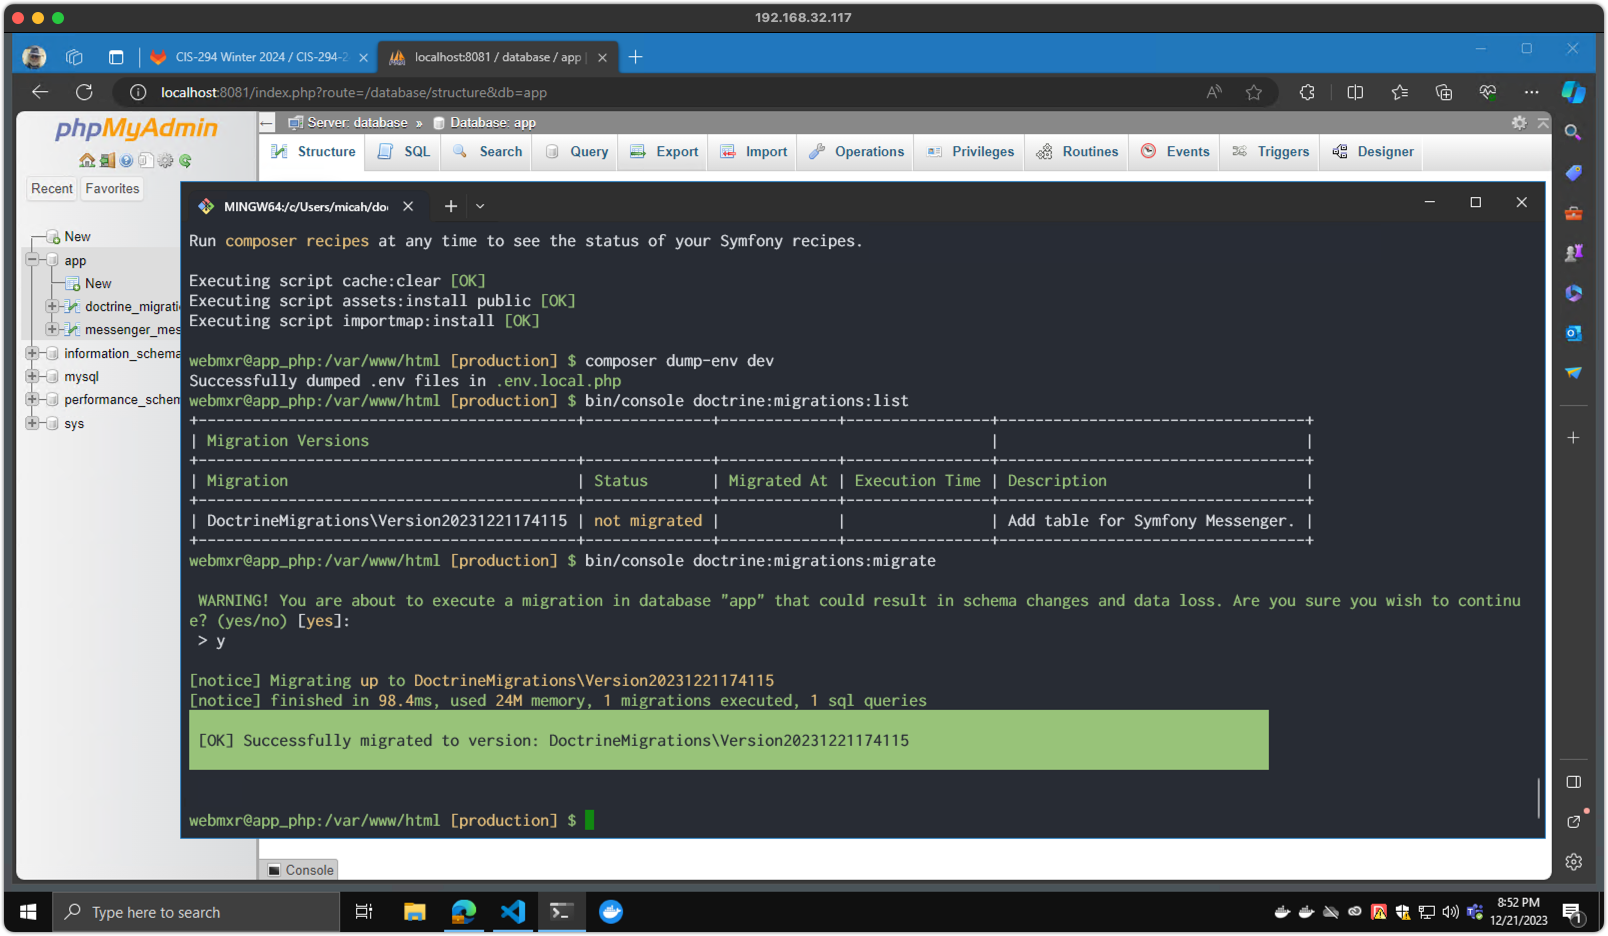
bin/console doctrine:migrations:listto list available database migrations.bin/console doctrine:migrations:migrateto execute database migrations.- Use phpMyAdmin on
http://localhost:8081/to verify table creation. (Log in as root/root)
Screenshot 4 - Running Database Migrations

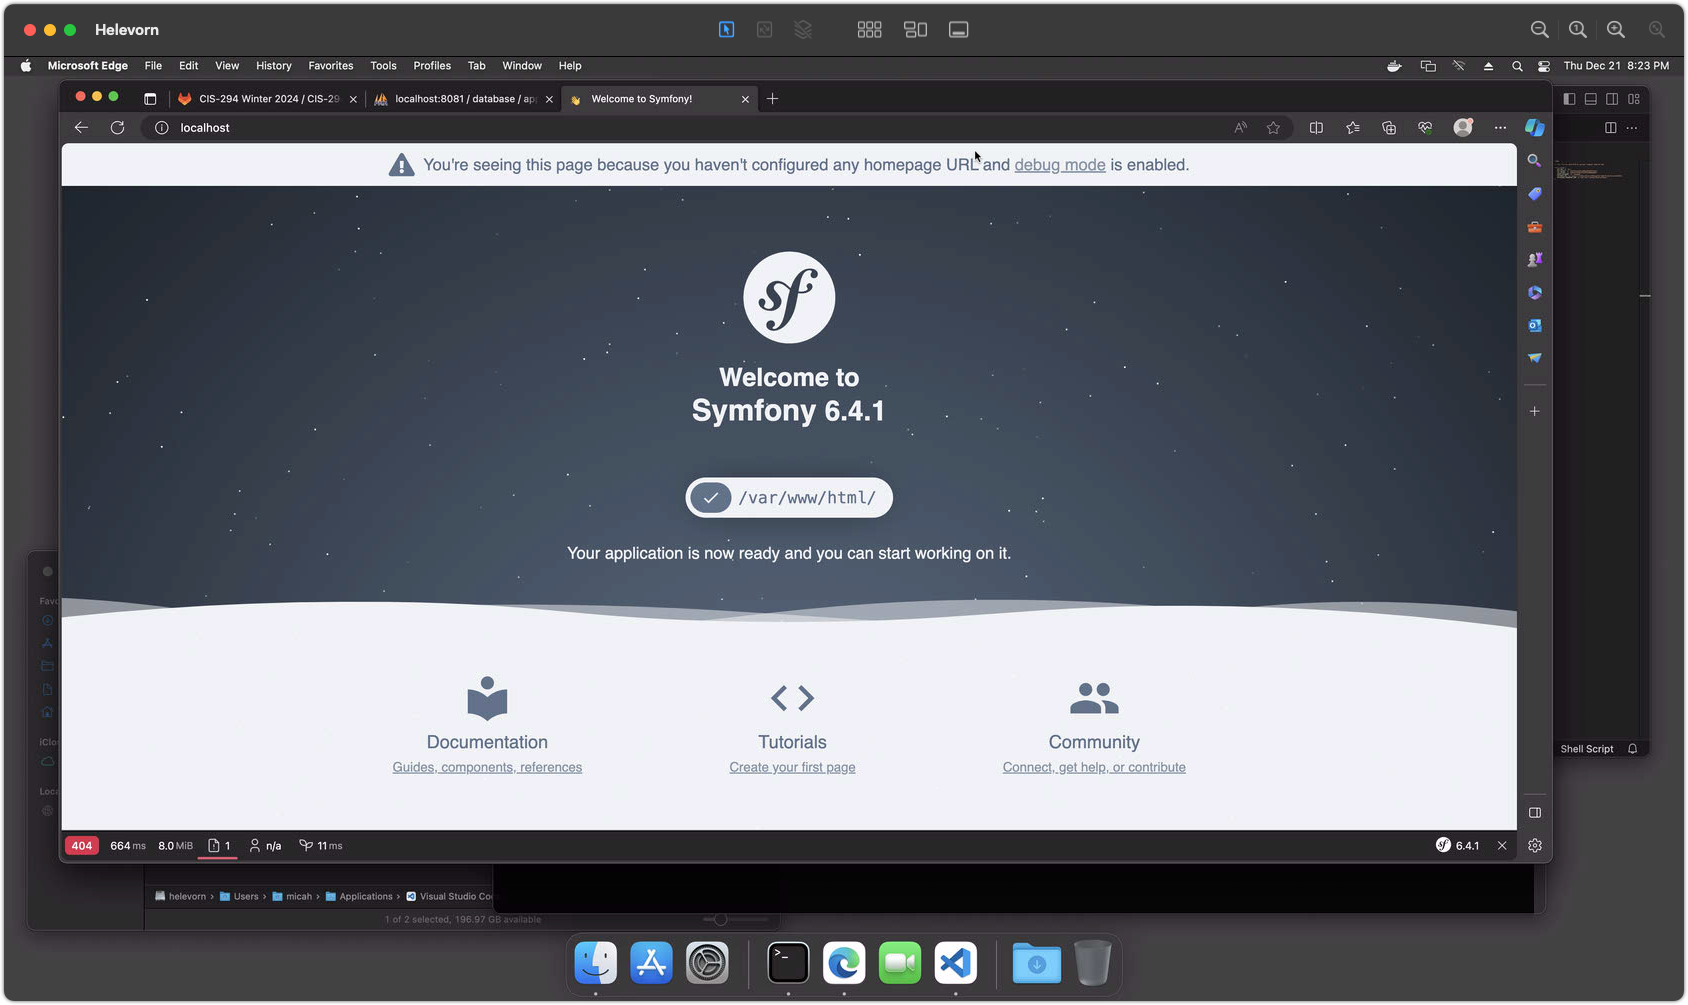
Step 5 (MacOS / Docker)
- View your site at
http://localhost/
(You may need to try a different port as noted in step 2.)
Screenshot 5 - Testing Your Development Website
Step 6 (MacOS / Docker)
When you are done working, you can use the following steps to exit from the container shell and shut down all running containers.
exit(or ctrl+d) from the container shell.docker compose downto stop and remove all containers.
Containers are temporary! It's okay to remove them. Your code is still in your ~/docker/axiom folder and your database is saved in a Docker volume for next time. You can shut down Docker if you need to free up resources for other work. It's also fine to leave your Docker containers running all the time if your computer can handle it, or simply pause them for a quick restart.
Screenshot 6 - Stopping Docker Containers
Site Installation with Docker on Windows
Step 1 (Windows / Docker)
Before you start, please make sure you've made the following settings on your computer:
git config --global core.autocrlf false
git config --global core.safecrlf false
git config --global core.ignorecase false
git config --global core.whitespace "fix,blank-at-eol,-blank-at-eof,-space-before-tab,tab-in-indent,tabwidth=2"
(See Recommended Editor and Git settings for more details.)
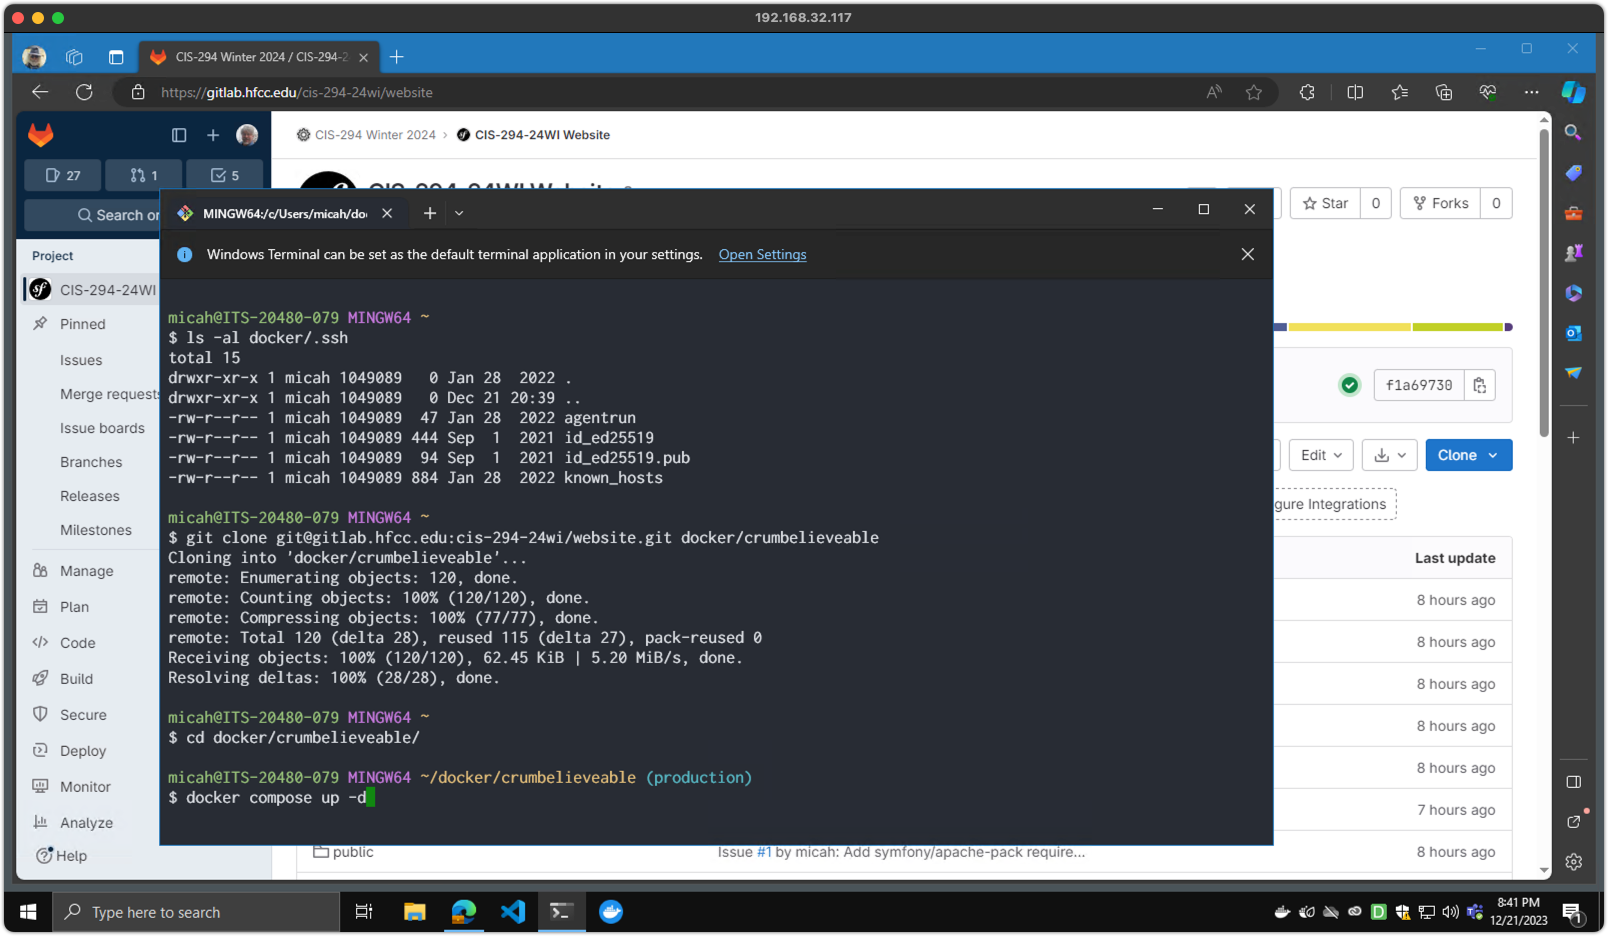
Once these steps have been verified, perform the following using Git Bash in your home directory:
mkdir ~/dockerto create a place for Docker projects.mkdir ~/docker/.sshto store a copy of your ssh keys that can be accessed by the Docker container.cp ~/.ssh/id_ed25519* ~/docker/.sshto copy your keys into the new directory.- Clone the project into the target directory.
For Winter 2026: git clone git@gitlab.hfcc.edu:cis-294-26wi/website.git ~/docker/axiom
Screenshot 1 - Git Installation
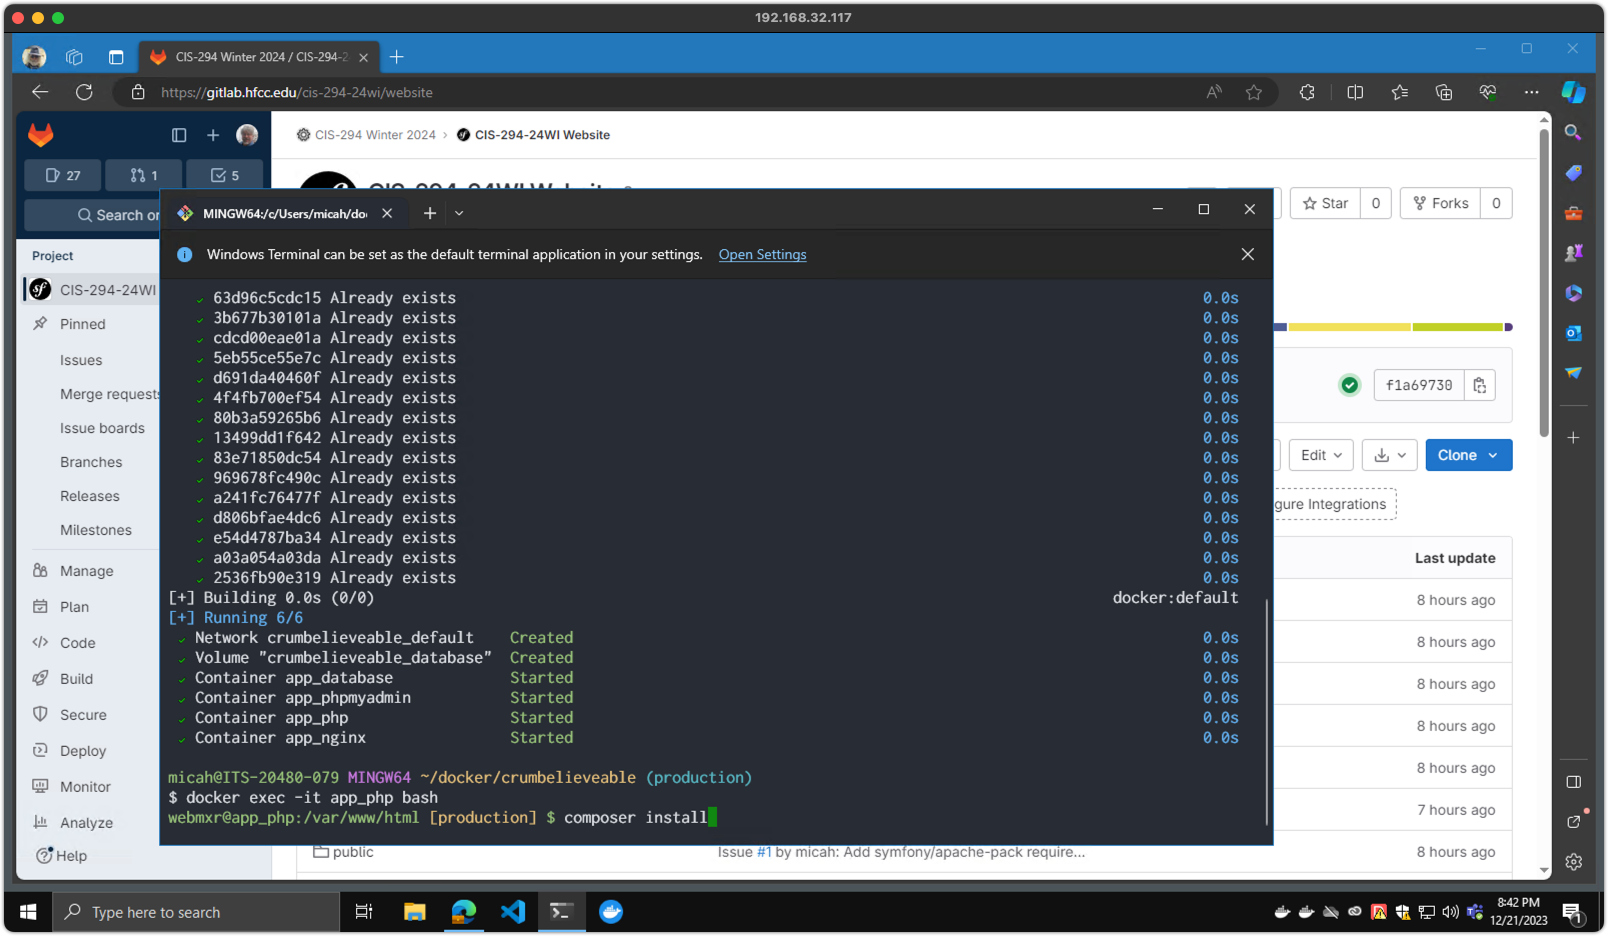
Step 2 (Windows / Docker)
cd ~/docker/axiomto get into the project directory.export NGINX_PORT=80to set the web server to port 80. (See notes below.)docker compose up -dto start the project running in Docker../fixperms.shdocker exec -it app_php bashto open a shell inside the Docker container.composer installinside the container to install Symfony components and dependencies.
Note: If the docker exec command fails with a message about winpty, try this instead:
winpty docker exec -it app_php bash
Note: You should only need to run ./fixperms.sh the first time, not on every startup.
Setting NGINX_PORT
The NGINX_PORT environment variable sets the port for the Nginx web server in your project. If this is not set, the project will default to port 8080, which you'll need to use in your browser. If port 80 is not available, you'll need to use the default or another port.
(In my Windows screenshots here, port 80 did not work, so you'll see 8080 in my browser's address bar in step 5 below.)
If port 80 works for your initial test, add the line export NGINX_PORT=80 to your ~/.bashrc file so it will be set automatically every time.
Screenshot 2 - Docker Compose Startup
Step 3 (Windows / Docker)
composer dump-env devinside the container to create your own local configuration file.- Open your project folder in Visual Studio Code (or the editor of your choice.)
- Edit the
.env.local.phpto adjust your settings. The defaults should mostly be fine. - Add settings for
ADMIN_PASSWORDandJWT_SECRETif they don't exist. You will need these later to provide an initial password for the admin user and for REST API security.
Screenshot 3 - Setting Environment Variables
Step 4 (Windows / Docker)
bin/console doctrine:migrations:listto list available database migrations.bin/console doctrine:migrations:migrateto execute database migrations.- Use phpMyAdmin on
http://localhost:8081/to verify table creation. (Log in as root/root)
Screenshot 4 - Running Database Migrations
Step 5 (Windows / Docker)
- View your site at
http://localhost/
(You may need to try a different port as noted in step 2.)
Screenshot 5 - Testing Your Development Website

Step 6 (Windows / Docker)
When you are done working, you can use the following steps to exit from the container shell and shut down all running containers.
exit(or ctrl+d) from the container shell.docker compose downto stop and remove all containers.
Containers are temporary! It's okay to remove them. Your code is still in your ~/docker/axiom folder and your database is saved in a Docker volume for next time. You can shut down Docker if you need to free up resources for other work. It's also fine to leave your Docker containers running all the time if your computer can handle it, or simply pause them for a quick restart.
Screenshot 6 - Stopping Docker Containers